

How To Adjust Font In Windows 10
On Windows 10, you lot tin alter the default system font, but y'all now have to make changes to the Registry to complete this job.
In older versions like Windows vii, the Command Console included personalization settings to change the system font for many visual elements on the desktop, such as File Explorer, icons, title confined, menus, message boxes, and more. However, for some reason, Windows x removed these settings, and you are at present stuck with the default organization font.
Nevertheless, it is possible to modify the "Segoe UI" default font on Windows ten, if that is something y'all want to do. Now, it but takes a few more steps using the Registry.
In this Windows 10 guide, we will walk you lot through the steps to alter the default arrangement font for most desktop elements.
- How to alter default font on Windows 10
- How to restore default system font on Windows x
How to change default font on Windows 10
To change the system font on Windows 10, employ these steps:
Warning: This is a friendly reminder that editing the Registry is risky and can cause irreversible impairment to your installation if you don't practice it correctly. Information technology's recommended to make a total fill-in of your PC before proceeding. Alternatively, you can create a organisation restore point, which will also help yous revert the changes.
- Open Start.
- Search for Notepad and click the height consequence to open the text editor.
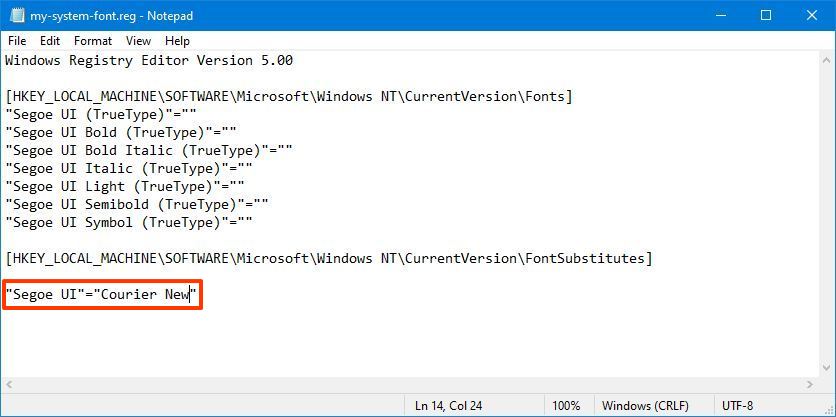
- Copy and paste the following Registry lawmaking onto the file:Windows Registry Editor Version 5.00[HKEY_LOCAL_MACHINE\SOFTWARE\Microsoft\Windows NT\CurrentVersion\Fonts]"Segoe UI (TrueType)"="""Segoe UI Bold (TrueType)"="""Segoe UI Bold Italic (TrueType)"="""Segoe UI Italic (TrueType)"="""Segoe UI Light (TrueType)"="""Segoe UI Semibold (TrueType)"="""Segoe UI Symbol (TrueType)"=""[HKEY_LOCAL_MACHINE\SOFTWARE\Microsoft\Windows NT\CurrentVersion\FontSubstitutes]"Segoe UI"="NEW-FONT-NAME"
- Open Settings.
- Click on Personalization.
- Click on Fonts.
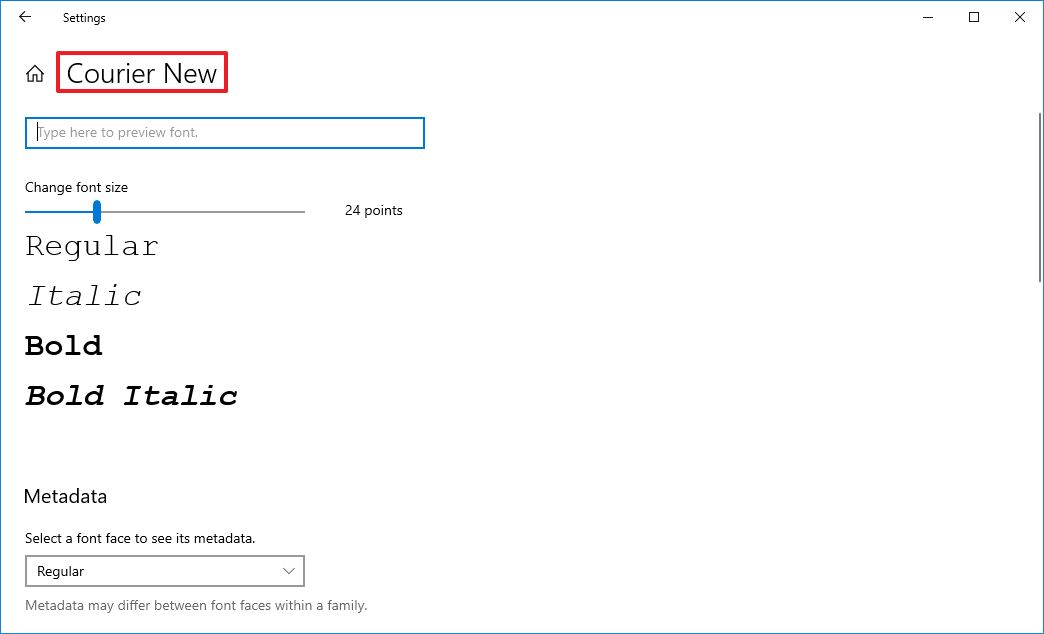
- Select the font family you want to use.
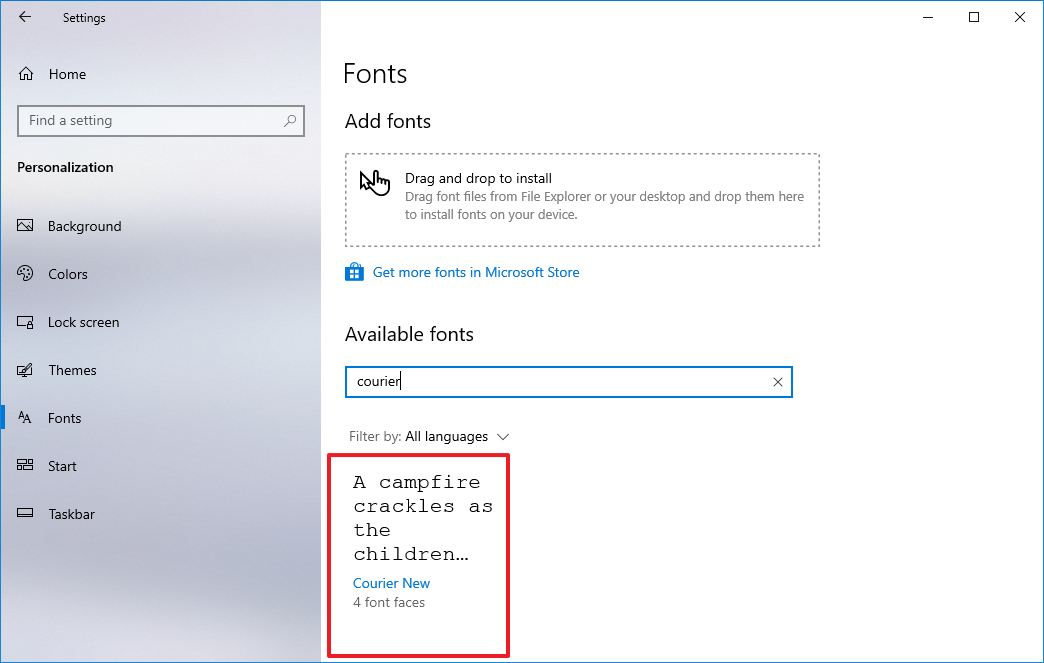
- Notation the official name of the font family – for example, Courier New.
- In the Notepad text with the Registry lawmaking, supplant "NEW-FONT-NAME" with the proper name of the font you want to use in the entire system – for example, Courier New.
- Click the File carte du jour.
- Select the Salve as option.
- Apply the "Save equally type" drop-down carte and select the All Files option.
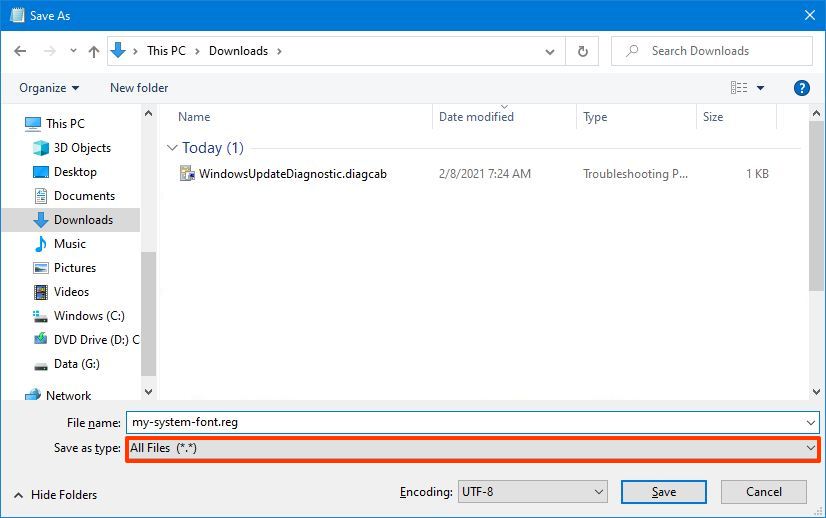
- Confirm a descriptive name for the file, such as "my-system-font," and use the ".reg" as the extension – for example, my-system-font.reg.
- Click the Relieve push button.
- Correct-click the newly created ".reg" file and select the Merge choice.
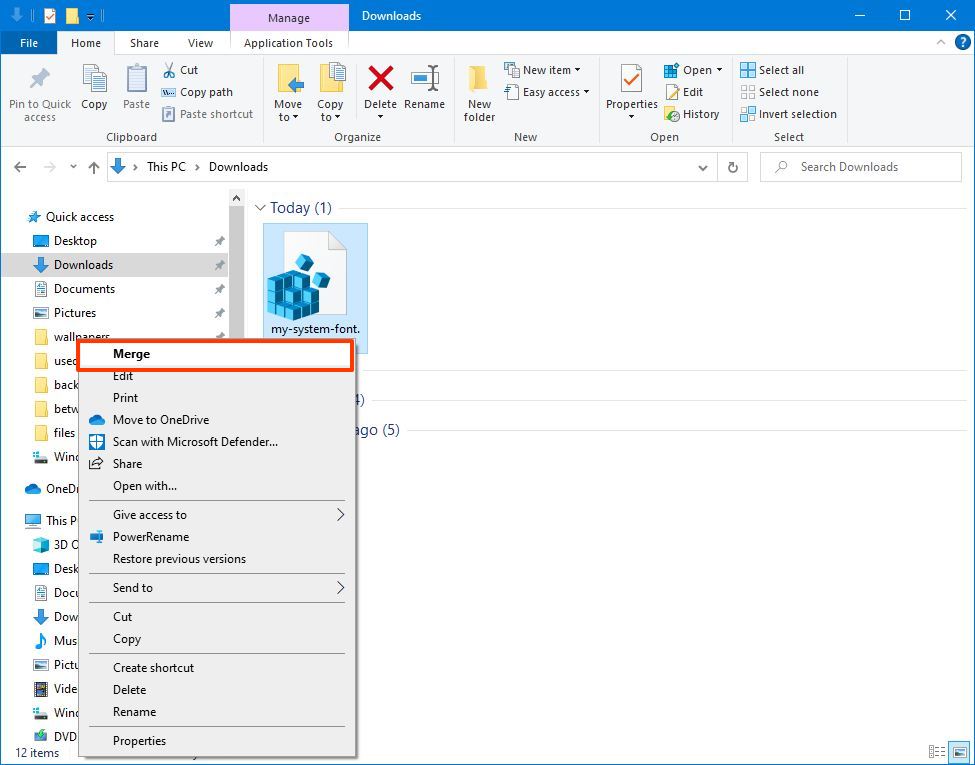
- Click the Aye push button.
- Click the OK button.
- Restart the computer.
One time you consummate the steps, the new font should be available throughout the desktop visual elements, including File Explorer, message box, taskbar, and apps that utilize the system default font settings.
Although you can select from a lot of different fonts, it is recommended to choose a style that is easy to empathise since fonts like Webdings or Wingdings apply symbols, and they can cause issues to the installation.
How to restore default organisation font on Windows 10
If yous change your heed, you can always restore the previous settings using the Registry or using a restore point.
Disengage settings with Registry
To restore the default font settings on Windows 10, employ these steps:
- Open up Start.
- Search for Notepad and click the top event to open the text editor.
- Re-create and paste the following Registry code onto the file:Windows Registry Editor Version 5.00[HKEY_LOCAL_MACHINE\SOFTWARE\Microsoft\Windows NT\CurrentVersion\Fonts]"Segoe UI (TrueType)"="segoeui.ttf""Segoe UI Black (TrueType)"="seguibl.ttf""Segoe UI Black Italic (TrueType)"="seguibli.ttf""Segoe UI Assuming (TrueType)"="segoeuib.ttf""Segoe UI Assuming Italic (TrueType)"="segoeuiz.ttf""Segoe UI Emoji (TrueType)"="seguiemj.ttf""Segoe UI Historic (TrueType)"="seguihis.ttf""Segoe UI Italic (TrueType)"="segoeuii.ttf""Segoe UI Light (TrueType)"="segoeuil.ttf""Segoe UI Light Italic (TrueType)"="seguili.ttf""Segoe UI Semibold (TrueType)"="seguisb.ttf""Segoe UI Semibold Italic (TrueType)"="seguisbi.ttf""Segoe UI Semilight (TrueType)"="segoeuisl.ttf""Segoe UI Semilight Italic (TrueType)"="seguisli.ttf""Segoe UI Symbol (TrueType)"="seguisym.ttf""Segoe MDL2 Assets (TrueType)"="segmdl2.ttf""Segoe Impress (TrueType)"="segoepr.ttf""Segoe Print Bold (TrueType)"="segoeprb.ttf""Segoe Script (TrueType)"="segoesc.ttf""Segoe Script Assuming (TrueType)"="segoescb.ttf"[HKEY_LOCAL_MACHINE\SOFTWARE\Microsoft\Windows NT\CurrentVersion\FontSubstitutes]"Segoe UI"=-
- Click the File card.
- Select the Save as option.
- Use the "Salvage every bit type" drop-downwards menu and select the All Files option.
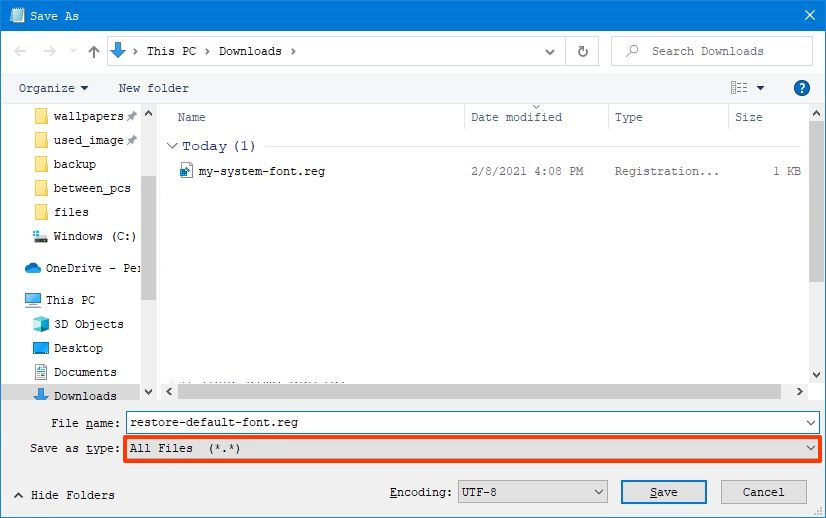
- Confirm a descriptive name for the file, such as "restore-default-font," and apply the ".reg" as the extension – for example, restore-default-font.reg.
- Click the Relieve button.
- Right-click the newly created ".reg" file and select the Merge option.
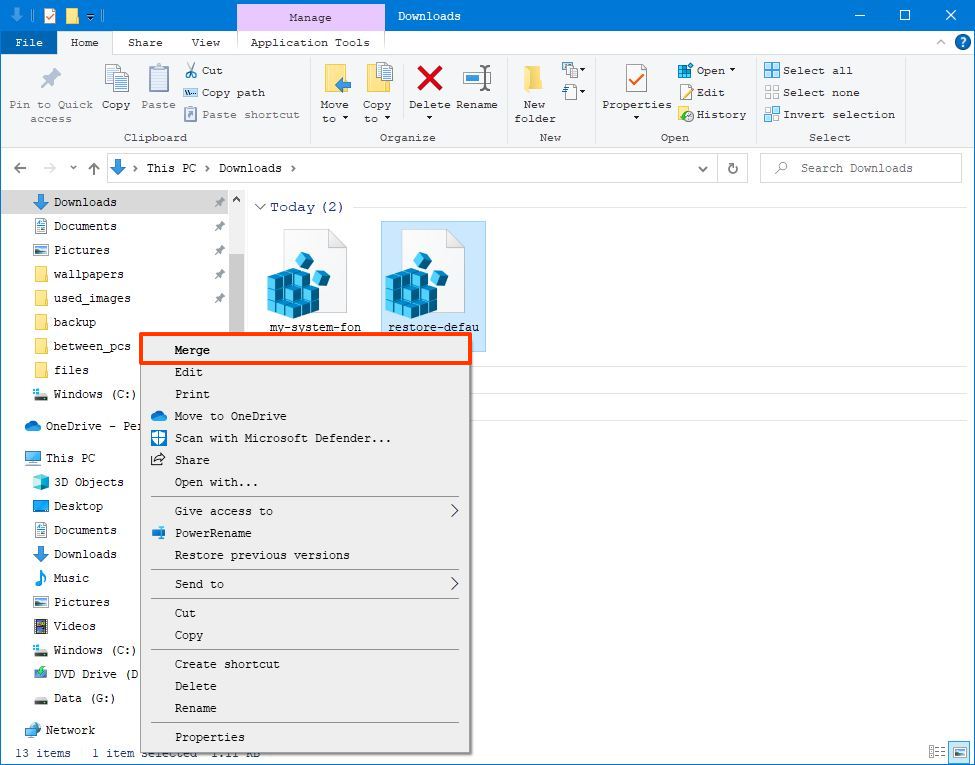
- Click the Yeah button.
- Click the OK button.
After you consummate the steps, the Windows ten default font should rollback to the previous configuration.
Disengage settings with Restore point
Alternatively, y'all could also utilise a previous restore betoken created before modifying the font settings to undo the changes. Even so, use this selection as a concluding resort, since depending on when you are restoring the organization, the feature may likewise disengage other system changes you may have configured after the restore bespeak was created.
To disengage system changes, use these steps:
- Open up Offset.
- Search for Create a restore betoken and select the height result to open the app.
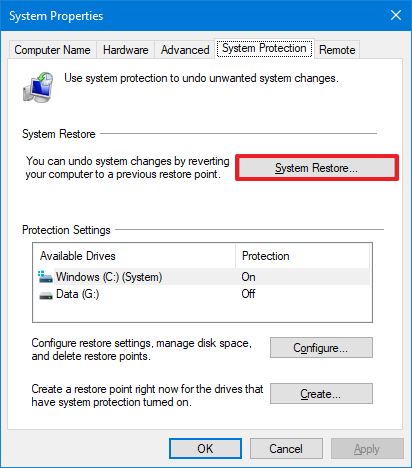
- Click the Organization Protection tab.
- Click the Arrangement Restore push button.
- Click the Next button.
- Select the restore point you created before applying the settings.
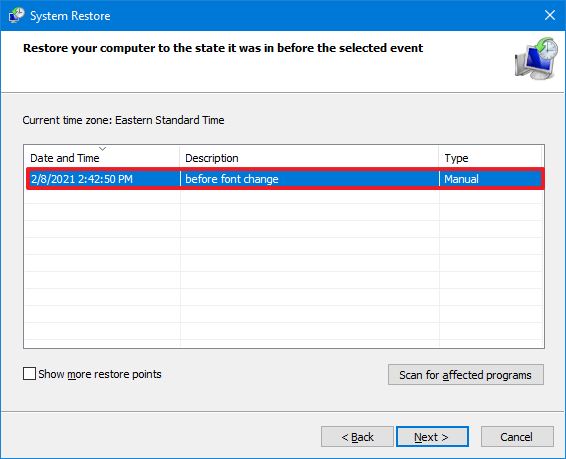
- Click the Adjacent button.
- Click the Finish button.
Once you consummate the steps, the system volition demand to be restarted to terminate the procedure.
Source: https://www.windowscentral.com/how-change-default-system-font-windows-10
Posted by: tristanwirciang.blogspot.com
0 Response to "How To Adjust Font In Windows 10"
Post a Comment